


Process
Initial sketches of our ideas
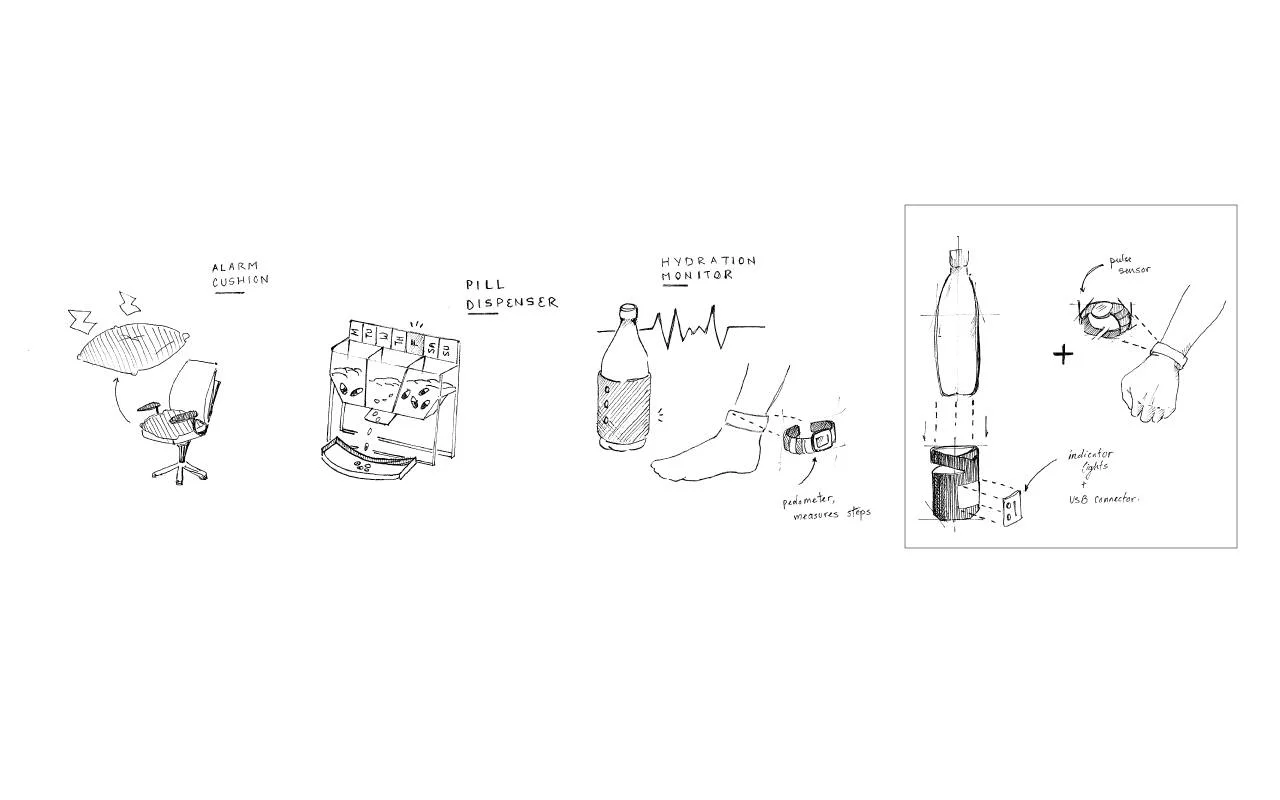
We were given the task of making a project using Arduino with the use of at least 3 sensors, and the first ideas my team members and I came up with were an alarm cushion, automatic pill dispenser, and a hydration monitor. Out of these ideas, we decided to go with the hydration monitor because we felt like it is something that would bring more attention to the positive impact that technology can have on health. With that being said we originally had the idea of designing our own water bottle and shirt as our project came with many complications.
The use and integration of our product (1)

As mentioned before our project had many complications, one being that we ran into waterproofing our electrical components. How we worked around this problem was that we found a water bottle that we were able to modify to include a compartment specifically for our circuit and sensors to be placed. More specifically, this compartment had two holes for our ultrasonic transducer to send signals towards the surface of the water thus making it not completely waterproof. We researched many different methods for waterproofing, but all lowered the sensors usability to be accurate. Finally, we decided to include a straw so that users would would not really need to tip the bottle, and having done this saves our sensors from being damaged by water.
The user and integration of our product (2)

Another problem we faced was that using a wristband was not an ideal way for measuring hydration, this was because we needed at least two points of contact - the hands, which were needed to send a current through the body in order to measure resistance. Also having the sensors on the wrist would limit movement and could be a safety hazard for the user. Given these points, we decided to integrate the circuit into a sports shirt, which then allows for the wires to pass through the sleeves and around the back of the shirt safely, just like the pulse sensor that is worn around the finger.
Further developments
Ideally for this project, my team and I had more ideas in mind that came with constraints. We wanted to design and 3D print a custom water bottle so that there will be compartments for each sensor. This was not possible for us as we had a certain budget for this project. We also had the idea of buying water proof sensors, however shipping them to our location was not ideal as they would take to long to ship. As for the interface, we wanted to design a better interface that would analyze collected data from all sensors and provide the user with feedback messages to maintain health. Lastly, our sensors were not always working perfectly, so my team and I wanted to increase the accuracy for measuring exercise, and we weren't able to do this because we needed better sensors.
Final thoughts
This Arduino project was one of the biggest projects I have ever done so far and it has challenged me in many ways. Some of these challenges include: the thought processes for user interface which we have relied on the Processing software for, the ideation that included carefully planned out ideas avoiding many errors as possible, and prototyping to be able to communicate our idea to our peers and instructor. Lastly, after having done this project and producing great results, I now have a better understanding of sensors and how they work, as well as how they could be implemented into technology for the use of health related products.
DRINKFIT (PRODUCT DESIGN)
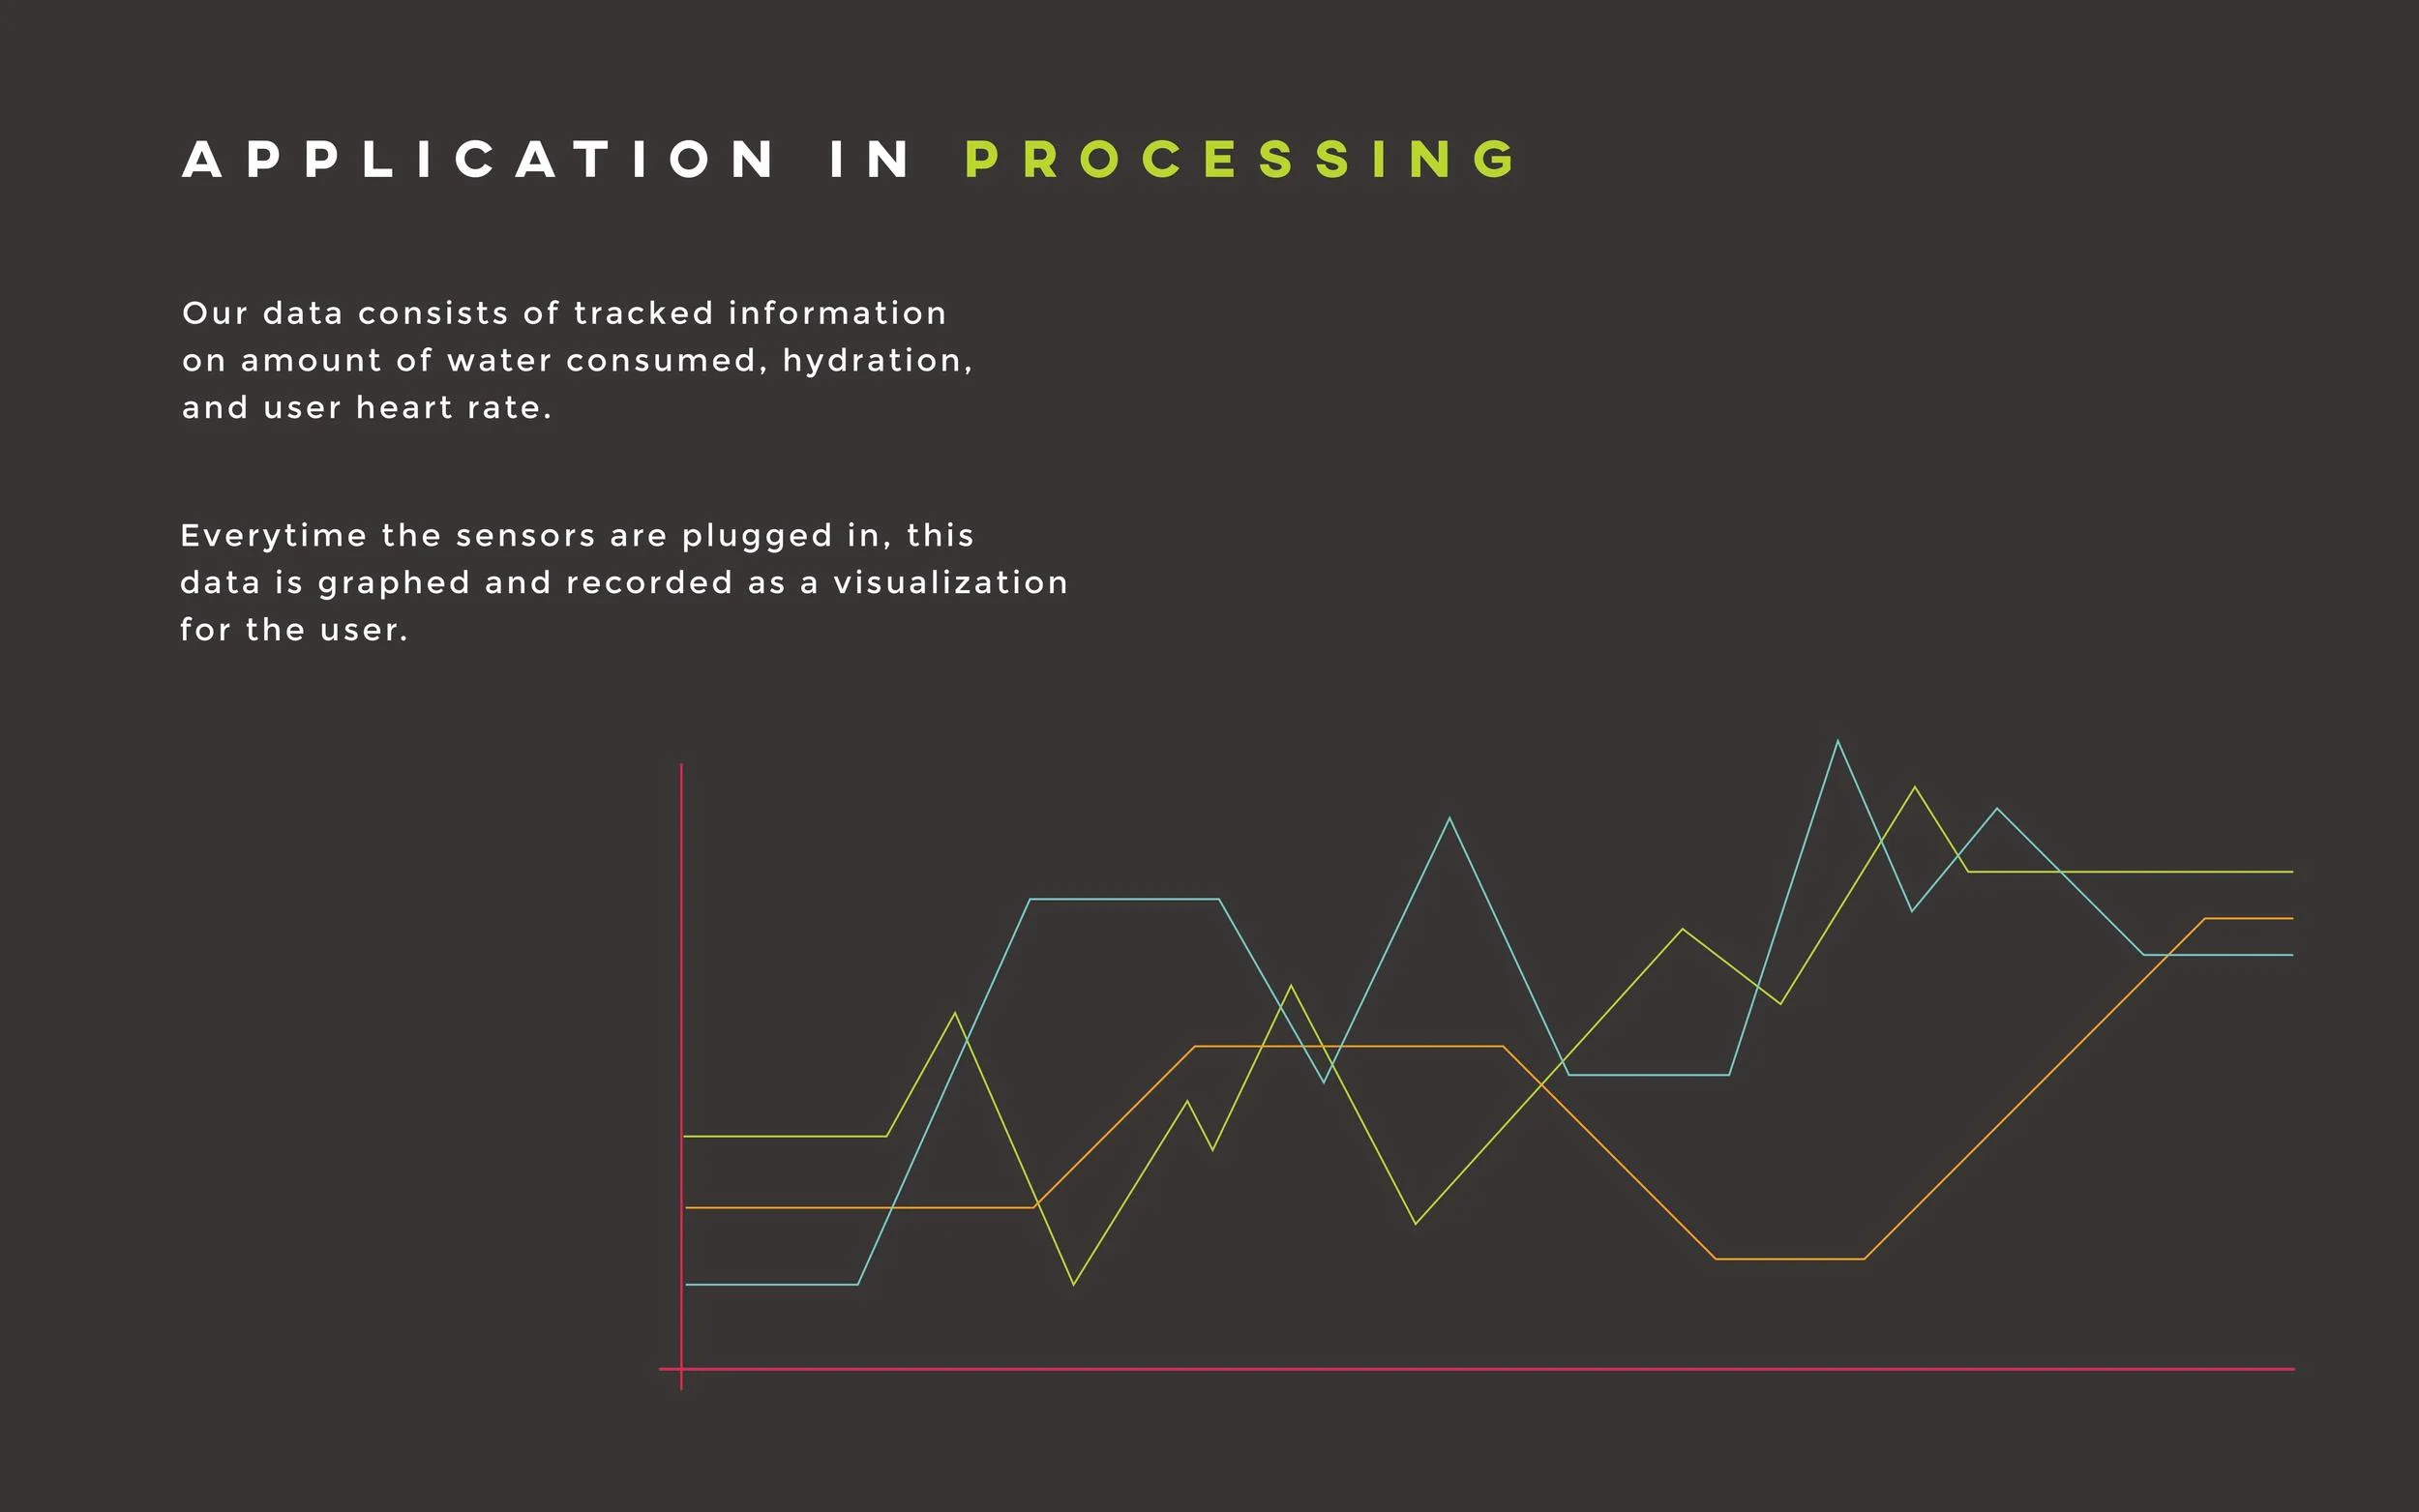
DrinkFit is a prototype of a device my team and I developed for an arduino project that aims to address the issue of hydration in athletes. This device uses different types of sensors to measure hydration through the use of a water bottle and a shirt that my team and I have designed. We also use a Processing software for the user interface, and an Arduino software for the circuit and sensors that are used to make the device function.
TYPE: Team project (4 people)
ROLE(S): Ideation, Bottle designer, Shirt designer, Presentation Slides, Hardware, and Quality Control.
TOOLS: Adobe Illustrator
YEAR: 2016